You guys! I've been sewing! To be honest I never left the Blogosphere, i've been lying low you could say.
So whats new? I'm now Mrs. Piemaker! We got married on the 3rd of September and the run up pretty much left me totally exhaustiflated not much time for anything really.
(We still haven't received our photos but when we do that is a post for another day.)
At the start of 2017 I made the decision to start doing more things that made me happy and one of the biggest things i'd missed recently was blogging and connecting with all the lovely people in this little corner of the interwebs.
So i'm back. I have a backlog of projects to blog but my output this year is going to be focused on more long term goals in my sewing than sheer magnitude.
In the time since I last popped my head in, I've lost quite a bit of weight. I did it mainly for the wedding but i'm still keeping with it, so a lot of clothes had to go, including some well loved me mades. I'm working on building my skills this year so that I can make more wearable garments that last.
Now on to todays main event!
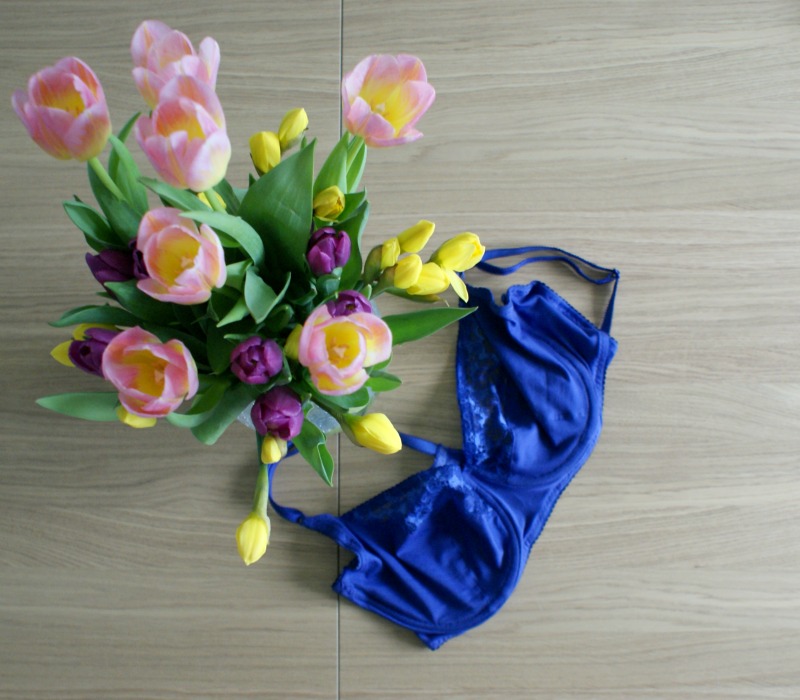
I made a freaking bra guys!
This has been on my to do list for like ever.
I bought some kits way back in 2013 but never had the confidence to give it a go. I decided this week that it was a totally irrational fear and with the release of the stunning
Harriet Bra from Cloth Habit, i dug out this Electric Blue Kit from
Sewing Chest (No longer available, well it was years ago!) and got cracking.
Now I'm not clever enough to have just done this by mere instructions alone, no no I had bought the Beverly Johnson's Sewing Bras, Construction and Fit Craftsy Class a while ago and watched it in stages. I made sure before I started, I watched the whole construction portion of the video and I made an order of construction with my own diagram to help me along,
then I tackled the cutting.
Bra making really does look scary without a kit and when I attempted it all those years ago I bought various bits of cupro and elastic expecting it to all make sense, it totally didn't and I still have some half cut up bras that are wasted because I didn't have the right tools. Trust me lovelies, buy a bra kit first. It made it so much easier having everything to hand!
After watching the class I used some cute post it notes to label each elastic I had so that I wouldn't grab the wrong one whilst sewing. Then I set up my laptop with the instructions, (great to scroll up and down quickly,) put on some soothing, relaxing music from Spotify and set to it.
This took me about 8 hours from cutting to finish over two days so all in all not too bad timewise.
Beverly Johnson says at the end of the class if you finish and you've got cup issues there isn't a lot that can be done unless you want to cut up your bra, its more a pattern issue. So I went in to this expecting an unwearable bra.
I was half right. I used the high bust and bust measurement to determine my bra size and it came out at a 38D. My ready to wear recently has been a 36/34 D so I was a little surprised. I persevered and low and behold my band was too big and my cup could do with going down too.
It is wearable but more as an "in house" bra although I am surprised at the comfort already even when its a little large!
There won't be any photos of me in it as I don't fancy that doing the rounds at the school I work at thank ya very much! But here it is on Evelyn who is a size 16.
Its much more flattering on her!
I also had some issues with the sides. They seem very high up into my underarm so I might take a little out from the outer cup. I also had some wrinkling at the top of the cup indicating the cup is too large. In my next go I will cut a 36C and see if that corrects it. If not, I think taking out some seam between the upper and inner cup may help.
I felt that after all that effort making a bra it would be silly not to have something to match it.
These are the Geneva panties from Seamwork. These are made from a knicker kit I bought with my bra kit all those years ago from Sewing Chest. I'm one of those people that buys 2 pairs of pants for every bra then forgets to wear them together!

I think I have to re-evaluate my sizing on things since I lost weight. I wasn't thinking when I cut an XL in these. I could easily have cut a medium, they are huge! Wearable but again more in the house than out on the town.
(Hah as if we do that anymore!)
These went together like a dream and left me wondering why on earth I haven't attempted underwear before. I wanted to keep the scallops on the lace visible so the waistband elastic is sewn in pieces rather than one band. As it turns out I would've been just as happy without the scallops but by the time I thought about it i'd run out of my blue picot.
I'm chalking this down to a learning experience but i've totally got the undies making bug!
I bought a couple more kits from
Elise Patterns to try out and I'm going to focus on getting Harriet fitting just right (oh would you look at that they have an electric blue kit just like mine!)
I can't speak highly enough of the Clothspot Harriet Pattern, her instructions are great with detailed diagrams and the steps don't overwhelm you. I can't wait to make another!
* This post was featured in Social Sew and Emerald Erin's Bra News